I want to shrink my second (LVM) partition, in order to create a new partition in the newly freed space. I am using the Live CD to do so, because I know I can't resize/move this partition while it is in use. When I opened GParted in the Live CD, I realized that I could not resize the partition, because when I right-click it, the option "resize/move" is disabled.
I tried to unmount it, to "lazy" unmount it (umount -l /dev/sda2) but it didn't work.
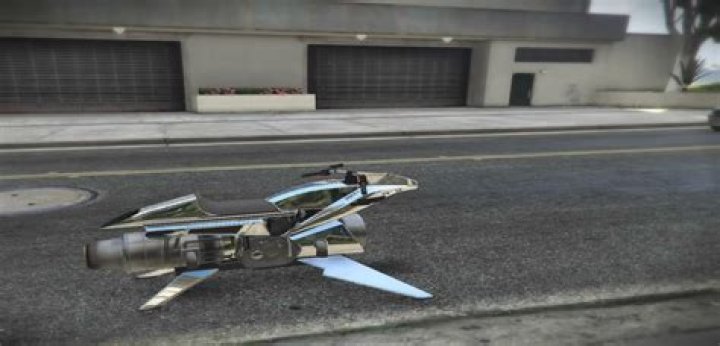
A screenshot from GParted:
8 Answers
Back up all your important data before attempting this. Always assume that you can lose all your data when resizing partitions.
Shrink LVM without dataloss
This forum thread suggests the following procedure, in this example we shrink a partition from 10G to 9G:
First, we unmount.
sudo umount /dev/vg_blah/lv_blahCheck the file system.
sudo e2fsck -f /dev/vg_blah/lv_blahResize the file system and the logical volume. Doing this in one step can avoid mistakes which cause dataloss. (Note lvreduce parameter
-LinterpretsGas 2^30 bytes andgas 10^9 bytes.)sudo lvreduce --resizefs -L 9G /dev/vg_blah/lv_blah(optional) Remove a physical drive from the volume group if desired (if you now have an unused drive).
sudo vgreduce vg_blah /dev/sdxy
All credit goes to brianmcgee.
Note: vgreduce will fail with cannot resize to xxxxx extents as later ones are allocated if you have another lv at the end of the disk - I had a swap lv, which I deleted. See How to shrink Ubuntu LVM logical and physical volumes? for help on that situation.
You can shrink/extend a logical volume very easily with a GUI tool: system-config-lvm. Because system-config-lvm does not come pre-installed, once booted from a live-cd, you have to install it:
sudo add-apt-repository "deb $(lsb_release -sc) universe"
sudo apt-get update
sudo apt-get install system-config-lvm
Once it is installed, run the program, select the logical volume you want to change in the left panel, click 'Edit Properties'.
Now change the parameters as you wish!
One good thing about system-config-lvm is that it won't allow you to go ahead if the new partition size is smaller than all your existing data combined (I've just tried this and seen for myself).
References:
- How-To Geek tutorial (this is the origin of the images).
- Red Hat's complete guide for the program.
Note: You should run almost all of the following commands using a Live CD. Sometimes, it wants you to unmount the partition that already mounted on / (in this case, you cannot unmount it).
These are all the steps required to resize a LVM or LVM2 partition:
sudo lvresize --verbose --resizefs -L -150G /dev/mapper/ubuntu
sudo pvresize --setphysicalvolumesize {some-space} /dev/sda5
If the second command produces something like this:
/dev/sda5: cannot resize to xxxxx extents as later ones are allocated.Then, you have to rearrange the unallocated space at the end of the LVM. That means after root and swap_1 partition. So, initially, you need to check physical volumes' information using the command below:
sudo pvs -v --segments /dev/sda5This will show the output like:
/dev/sda5 ubuntu lvm2 a-- 698.04g 150g 0 xxx root 0 linear /dev/sda:0-rrr
/dev/sda5 ubuntu lvm2 a-- 698.04g 150g xxx sss 0 free
/dev/sda5 ubuntu lvm2 a-- 698.04g 150g zzz ttt swap 0 linear /dev/sda5:yyy-www
Note the yyy-www. Use the following command to remove external fragmentation:
sudo pvmove --alloc anywhere /dev/sda5:yyy-wwwNow, let us see how it goes:
sudo pvs -v --segments /dev/sda5This will show the output like (note the changes):
/dev/sda5 ubuntu lvm2 a-- 698.04g 150g 0 xxx root 0 linear /dev/sda:0-rrr
/dev/sda5 ubuntu lvm2 a-- 698.04g 150g xxx ttt swap 0 linear /dev/sda5:xxx-sss
/dev/sda5 ubuntu lvm2 a-- 698.04g 150g yyy www 0 free
After that, use the GParted and resize the LVM to maximum used area and rest will be in unallocated space. Enjoy...
1I would recommend another GUI tool - KVPM. It combines functionality of GParted and system-config-lvm. Moreover, it allows some operations on live (mounted) partitions that system-config-lvm doesn't allow However, the volume has to be unmounted for shrinking.
It is in universe repository since Ubuntu 12.04, so just do sudo apt-get install kvpm
Note: start it with root rights sudo kvpm
Only the latest version of Gparted (0.14) supports resizing LVM physical volumes. The version that ships with Ubuntu 12.10 or 13.04 does not support it.
Here's how to resize an LVM physical volume:
If the volume group associated with the LVM physical volume does not have enough unallocated space, you'll need to make some by shrinking a logical volume. Look at bigbadonk420's answer for instructions on how to do that. You can also use GNOME Disks (included with Ubuntu) for some of the steps if you prefer a GUI.
Burn the latest .iso image from GParted's website, and burn it on a CD or put it on a USB stick. Boot from the CD or the USB stick. Alternatively, you could compile the latest version of GParted from source.
Use GParted to resize the LVM physical volume. GParted won't let you shrink the LVM physical volume to a size smaller than what the unallocated space allows.
I found this answer by accident, but this worked for me at least. In my case I had already a reserved unallocated disk space after the root, so I skip the part how you get more space and just explain how I used it on root without booting.
NOTE: Instead of using gparted, you are probably better off using system-config-lvm. Next time I would use that one instead... My gparted version was 0.18.
- First I used
gpartedto extend root partition as much as I could. To my surprise it extended only the physical sizes and did nothing to the logical part. Sodf -kcommand said that the disk was full still. lvresize -l +100%FREE /dev/ubuntu-vg/rootextends the logical partition as far as it can. No need to check and calculate GBs or blocks in various methods.resize2fs /dev/ubuntu-vg/rootis then the third step I did: it extends the file system to the size of the logical partition.
The last step can be merged into the second:
lvresize -l +100%FREE --resizefs /dev/ubuntu-vg/root
In addition to the @bigbadonk420's answer, Instead of doing the following:
resize2fs -p /dev/vg_blah/lv_blah 9G
lvreduce -L -1G /dev/vg_blah/lv_blah
Do:
lvreduce -r -L 9G /dev/vg_blah/lv_blahNote the -r which reduces the file system simultaneously and is safe.
Warning about the currently most voted answer: To NOT destroy your fresh default installation with LVM option (14.04 Trusty Tahr), 1) read the whole page, 2) delete swap 3) and probably modify the command for "Reduce the size of the logical volume" like this:
lvreduce -L -1g /dev/vg_blah/lv_blahI strongly recommend system-config-lvm.